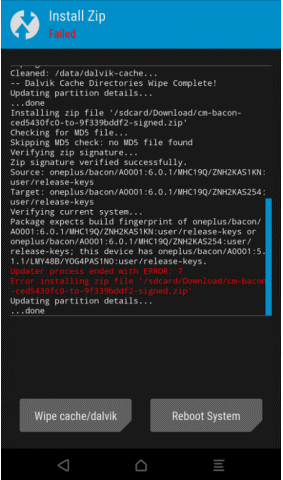
If you also got error 7 in TWRP, so don’t worry here we will discuss a method to resolve the issue so that you can flash any custom ROM easily. So let’s get started
What is Error 7 In TWRP?
This error will encounter while you are flashing custom ROM in your Android or Tablet, sometimes it may occur with CWM (Clock Work Mode) Recovery. Aforementioned, the error occurs because of the wrong script file (the ROM updater-script file, which isn’t designed for your product model). And another reason for this error could be that you have missed some important steps previously. The ‘Error: 7’ or ‘Status Error 7’ or ‘ZIP signature verification failed error’ all are similar issues and cause when there is any problem with the ROM’s updater script file or missed steps. If accidentally you have installed the wrong ROM updater script which is not for your phone’s model, so in such case you need to download the ‘native’ script, you can use Assert mechanism, for this it will prevent you from downloading another phone’s ROM updater-script. Well, this error is not going to harm your device, you can always go back and continue with whatever you were doing, but if you want to resolve this error, so let’s begin with the fix to resolve the error 7 in TWRP.
Fix
Format & Remove the Cache
The best and easiest method to resolve the Error 7 in TWRP is to format the cache partition of your device. You can also format the Dalvik cache, and format data partition as well. To do so, follow the given steps:
Restart your system into device recovery mode, i.e. TWRP (Team win Recovery project ), or CWM (Clockwork Mode Recovery).
After entering into Recovery mode, you will get a list of a few options, select Advanced Wipe.Here, select Cache, Dalvik Cache, and Data.Now Wipe selected partitions.If you have TWRP, then it will prompt a text bar, type Yes init.This will format and remove the cache.After finishing the process, try again to flash custom ROM.
Update your Bootloader
If your Android’s bootloader is outdated, so it may also lead to generating the error 7 in TWRP while you are flashing any Custom ROM in the device. So try to update your Android device’s bootloader to the latest version before installing custom ROM.
Remove Assert Checks
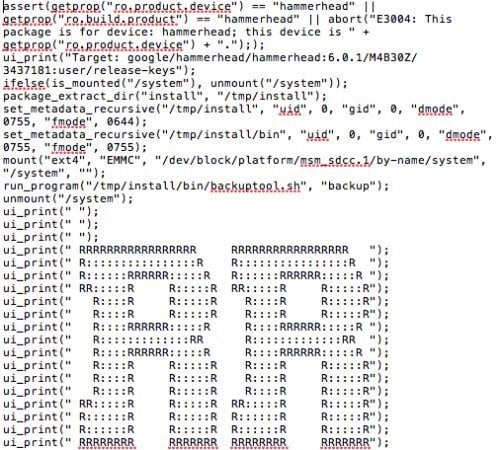
If you are confident that the ROM’s updater script file is correct and don’t need to change, so you should try removing Assert checks. It will change the ROM package, which may be generating Error 7 in TWRP. To do so, follow the given steps
Copy the ROM zip file into your PC, and unzip the archive.Now, you will able to access a folder called META-INF. Open itGo to META-INF/com/google/android line.In the last folder/ directory you will found two files called “update-binary” and “updater-script”.Here, rename the “updater-script” to “updater-script.txt”, and open it with any text editor.Now, locate and remove the line starting with an “assert”. Generally, this line found at the beginning of the content, usually beside the codename of the device. Now, save all the changes, again change the file from “updater-script.txt” to “updater-script”.Zip the folder and copy it to your phone or tablet.Reboot your Android phone into recovery mode, and retry flashing Custom ROM.The error 7 in TWRP or Status Error 7 has been gone.
Install Latest Recovery Version
With each updated version of Android, recovery tools also get changed and so if you are installing the latest Android version with the old Recovery version, it can cause an error. Ensure that the custom recovery version is also updated. To check this, you can visit the TWRP website and get the latest recovery version for Android devices. That’s it from our side guys, I hope you would like the content and the error 7 in TWRP has been fixed. If you know some more methods or have some suggestions, so please share them with us in the comment section. Thats not true : error still exist 2022 xD updater-script start with : ui_print(“Target: samsung/line… updater script usually starts with (! and end in the line which starts with an assert

